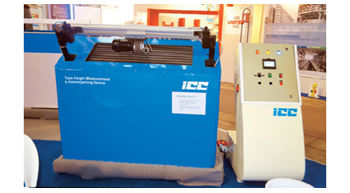
Tops height measurement device
It is well established that to achieve consistent quality of the sliver, the shape and the height of the wire points on the revolving flats are critical.
It is well established that to achieve consistent quality of the sliver, the shape and the height of the wire points on the revolving flats are critical. The wire points on revolving flats wear out, often unevenly, during the course of the operation of the carding machine. Uneven wire points result in a variation in the setting between the cylinder wire points and the revolving flats wire point ultimately leading to poor quality of the carded sliver.
It is common to carry out re-sharpening of the revolving flat wire points at regular intervals. When re-sharpening, it is critical to know the depth of the cut required to ensure a consistent height across the length of the revolving flat. Often, the entire set of revolving flats is removed from the carding machine and the height of each revolving flat is measured and recorded. Based on this data, the resharpening activity is undertaken, often on a traditional grinding machine. This is a time consuming process during which the carding machine is stopped.
With the present generation of on card flat grinding machine, no system is available to check and analyse flat tops height on the machine, to decide on the amount of grinding cut to be given. The carding technician has to depend on his perception of flame intensity, colour, and sound to decide on depth of grind cut. With present flat tops with micro alloy steel metallurgy flame intensity or, colour is often not properly visible. This makes decision on grinding cut extremely difficult, often leading to improper and excessive grinding.
The ICC Tops Height Measurement Device was developed to address all of the shortcomings of the current process. Both devices enable accurate measurement of the revolving flats, one measure the flats off the carding machine, whilst the other while the flats are in position on the carding machine.
The salient features of both devices are:
- Data is transmitted and stored digitally avoiding errors through manual recording.
- Software can process data to show total variation and minimum/maximum readings.
- State-of-the-art instrumentation used to measure the height of the flats.
- Measurement is done with a precision of 1 micron.
- Helps in maintaining consistency of card quality result.
- Improves working life of Flat tops.
The precision with which data is measured and the accuracy with which it is recorded allows for the exact amount of material removal during re-sharpening of the flats thereby ensuring an enhanced life for the flats and consistency in quality of the carded sliver.
For further information:
AK Pal of The Indian Card Clothing Co Ltd
General Manager (Products Application)
Tel: 20 39858243 (Direct), 39858200 (Gen)
Email: apal@cardindia.com, Web: www.cardindia.com

